

Prerequisite: You need an existing project before creating a VPC.
Summary
This page explains how to create and manage Virtual Private Cloud (VPC) networks in the nscale Console UI. Use this workflow if you:- Need a private network boundary for workloads in a specific project
- Want to prepare networking before creating instances (you need at least one VPC to create instances)
Availability
This feature is available for On-demand and Reserved cloud services.Requirements
- A project where the VPC will be created (VPCs are project-scoped; you can create multiple VPCs per project)
- Permission and sufficient quota to create a VPC
VPCs are project-scoped — you can create and use multiple VPCs within the same project.
VPC Lifecycle
Step-by-step
Create a new VPC
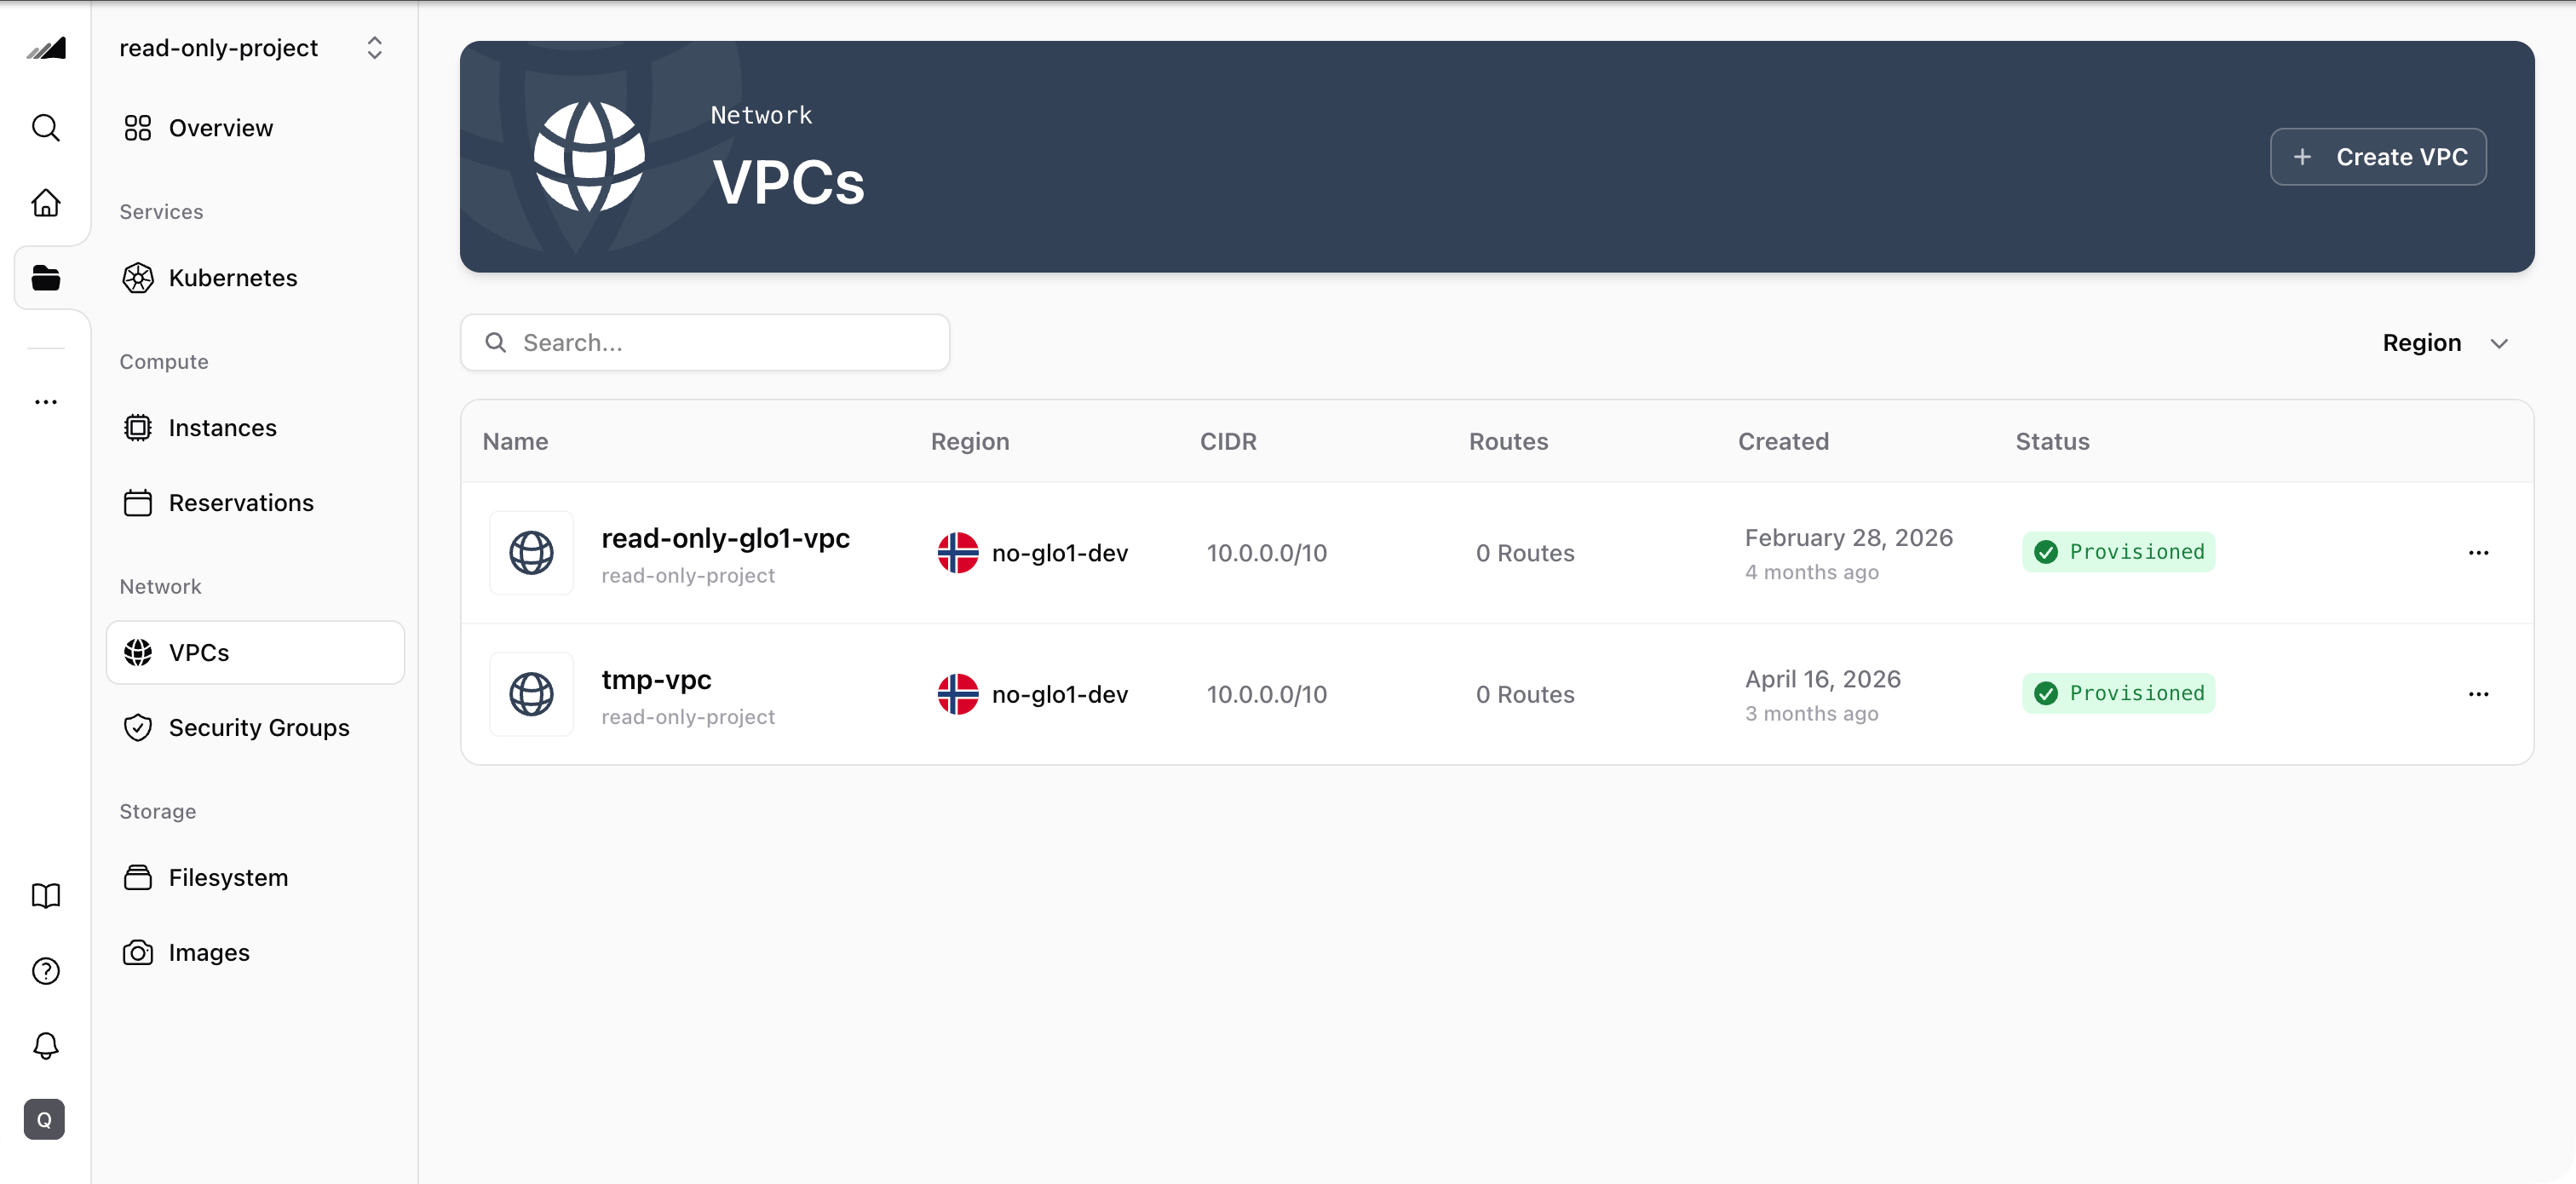
- In the Console, open your project, then open Network in the project sidebar.
- Select VPCs.
- Click Create VPC.
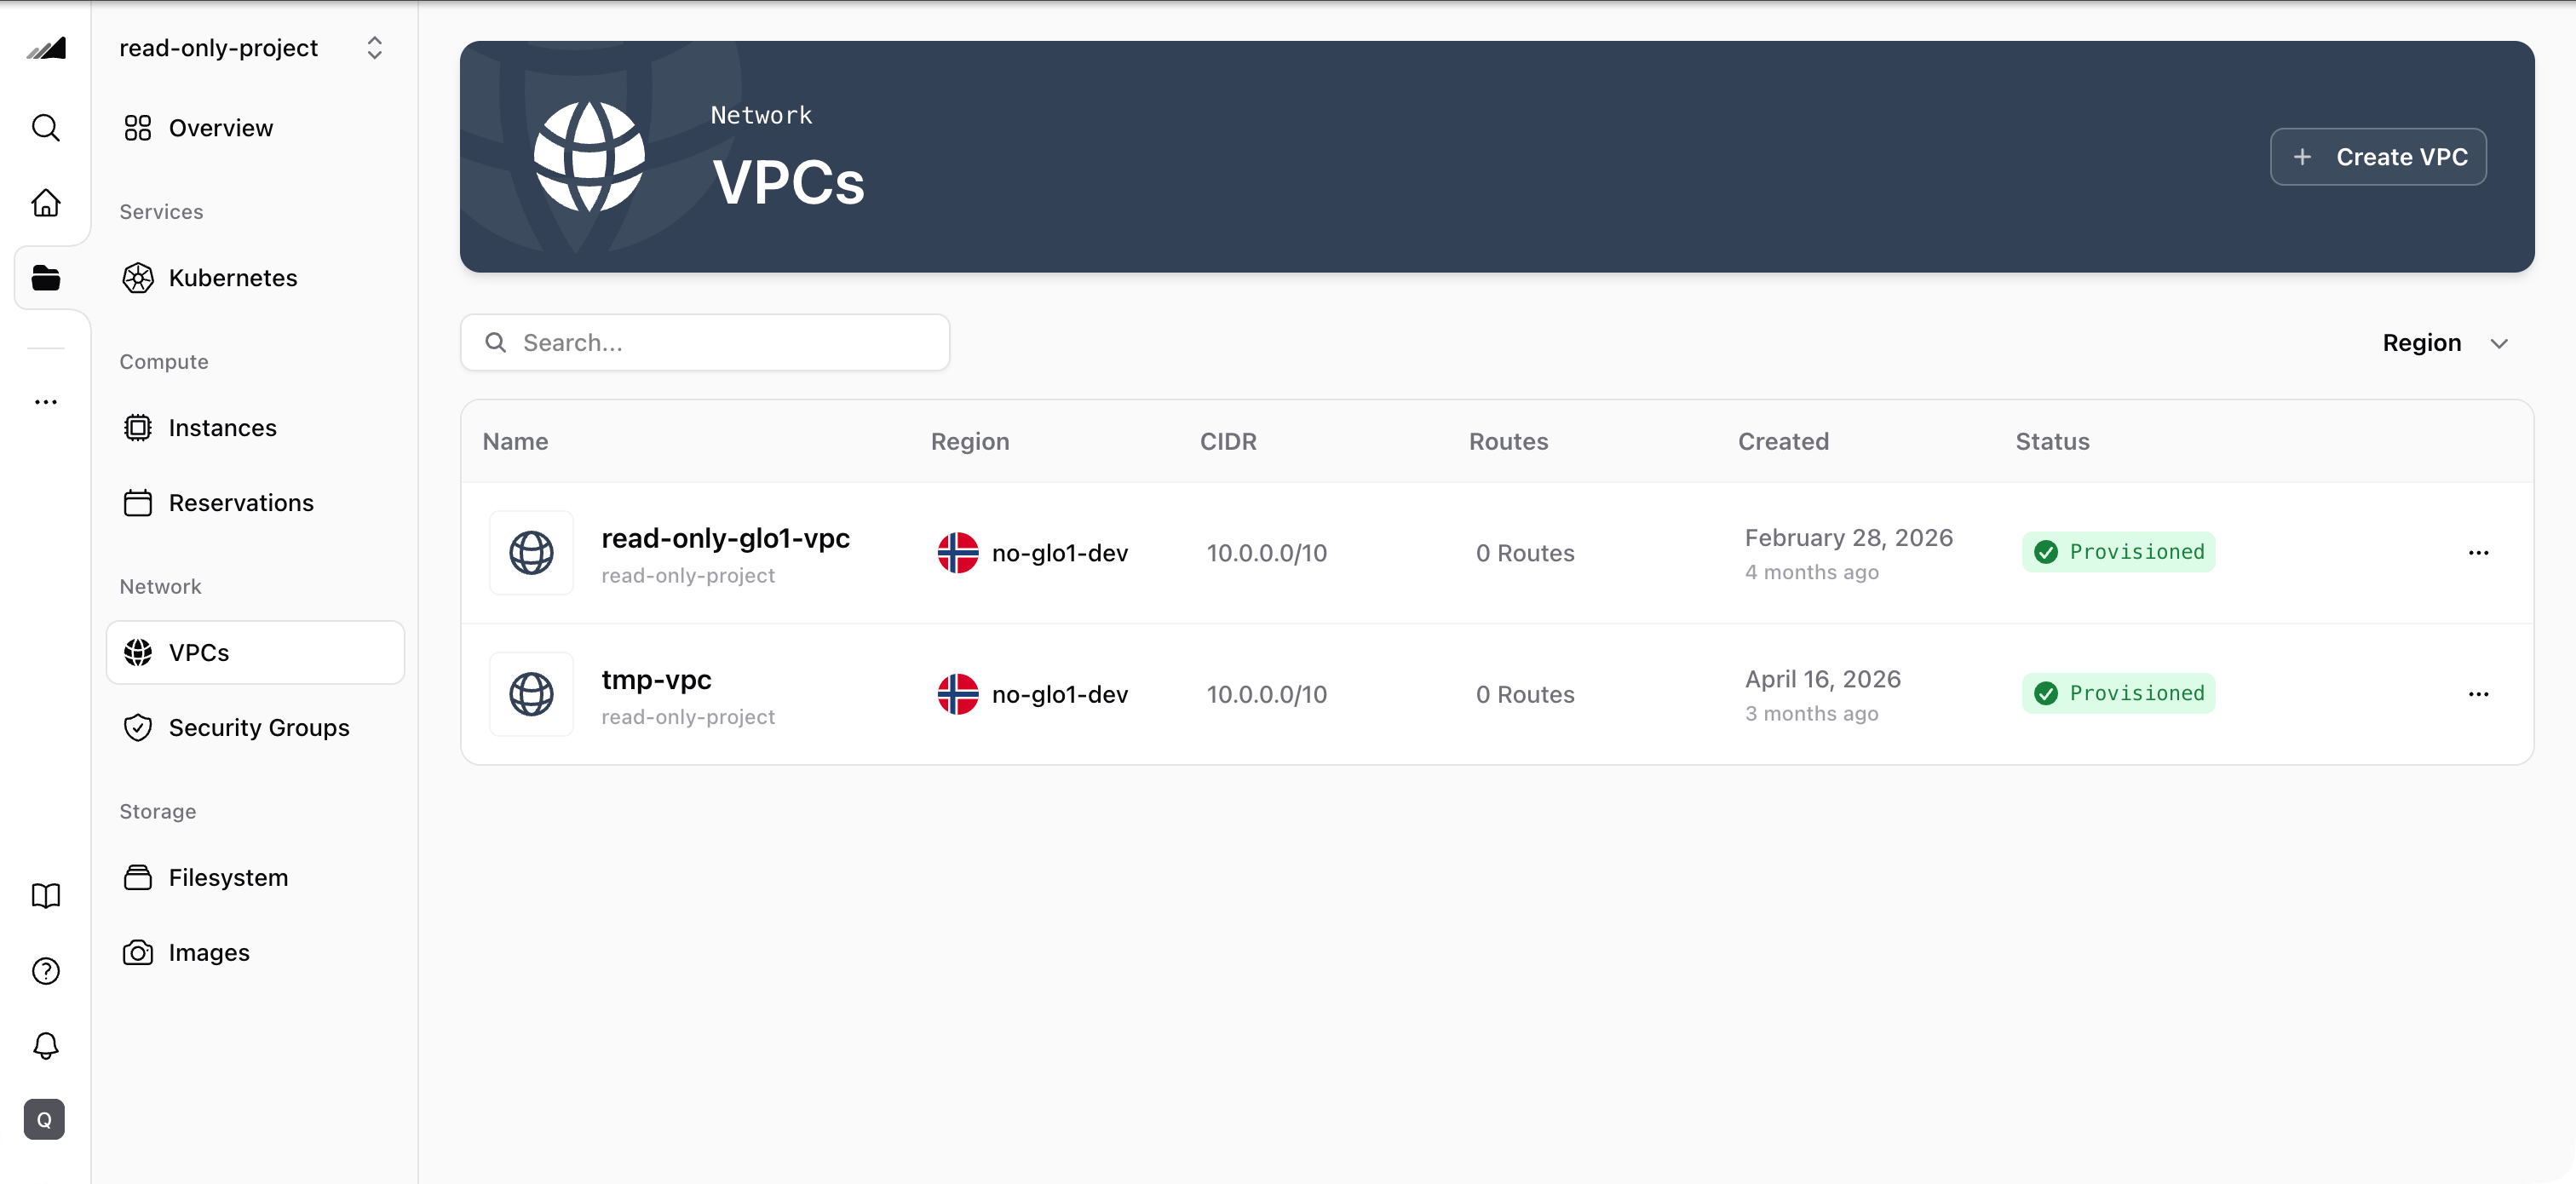
Step 1 — Details
-
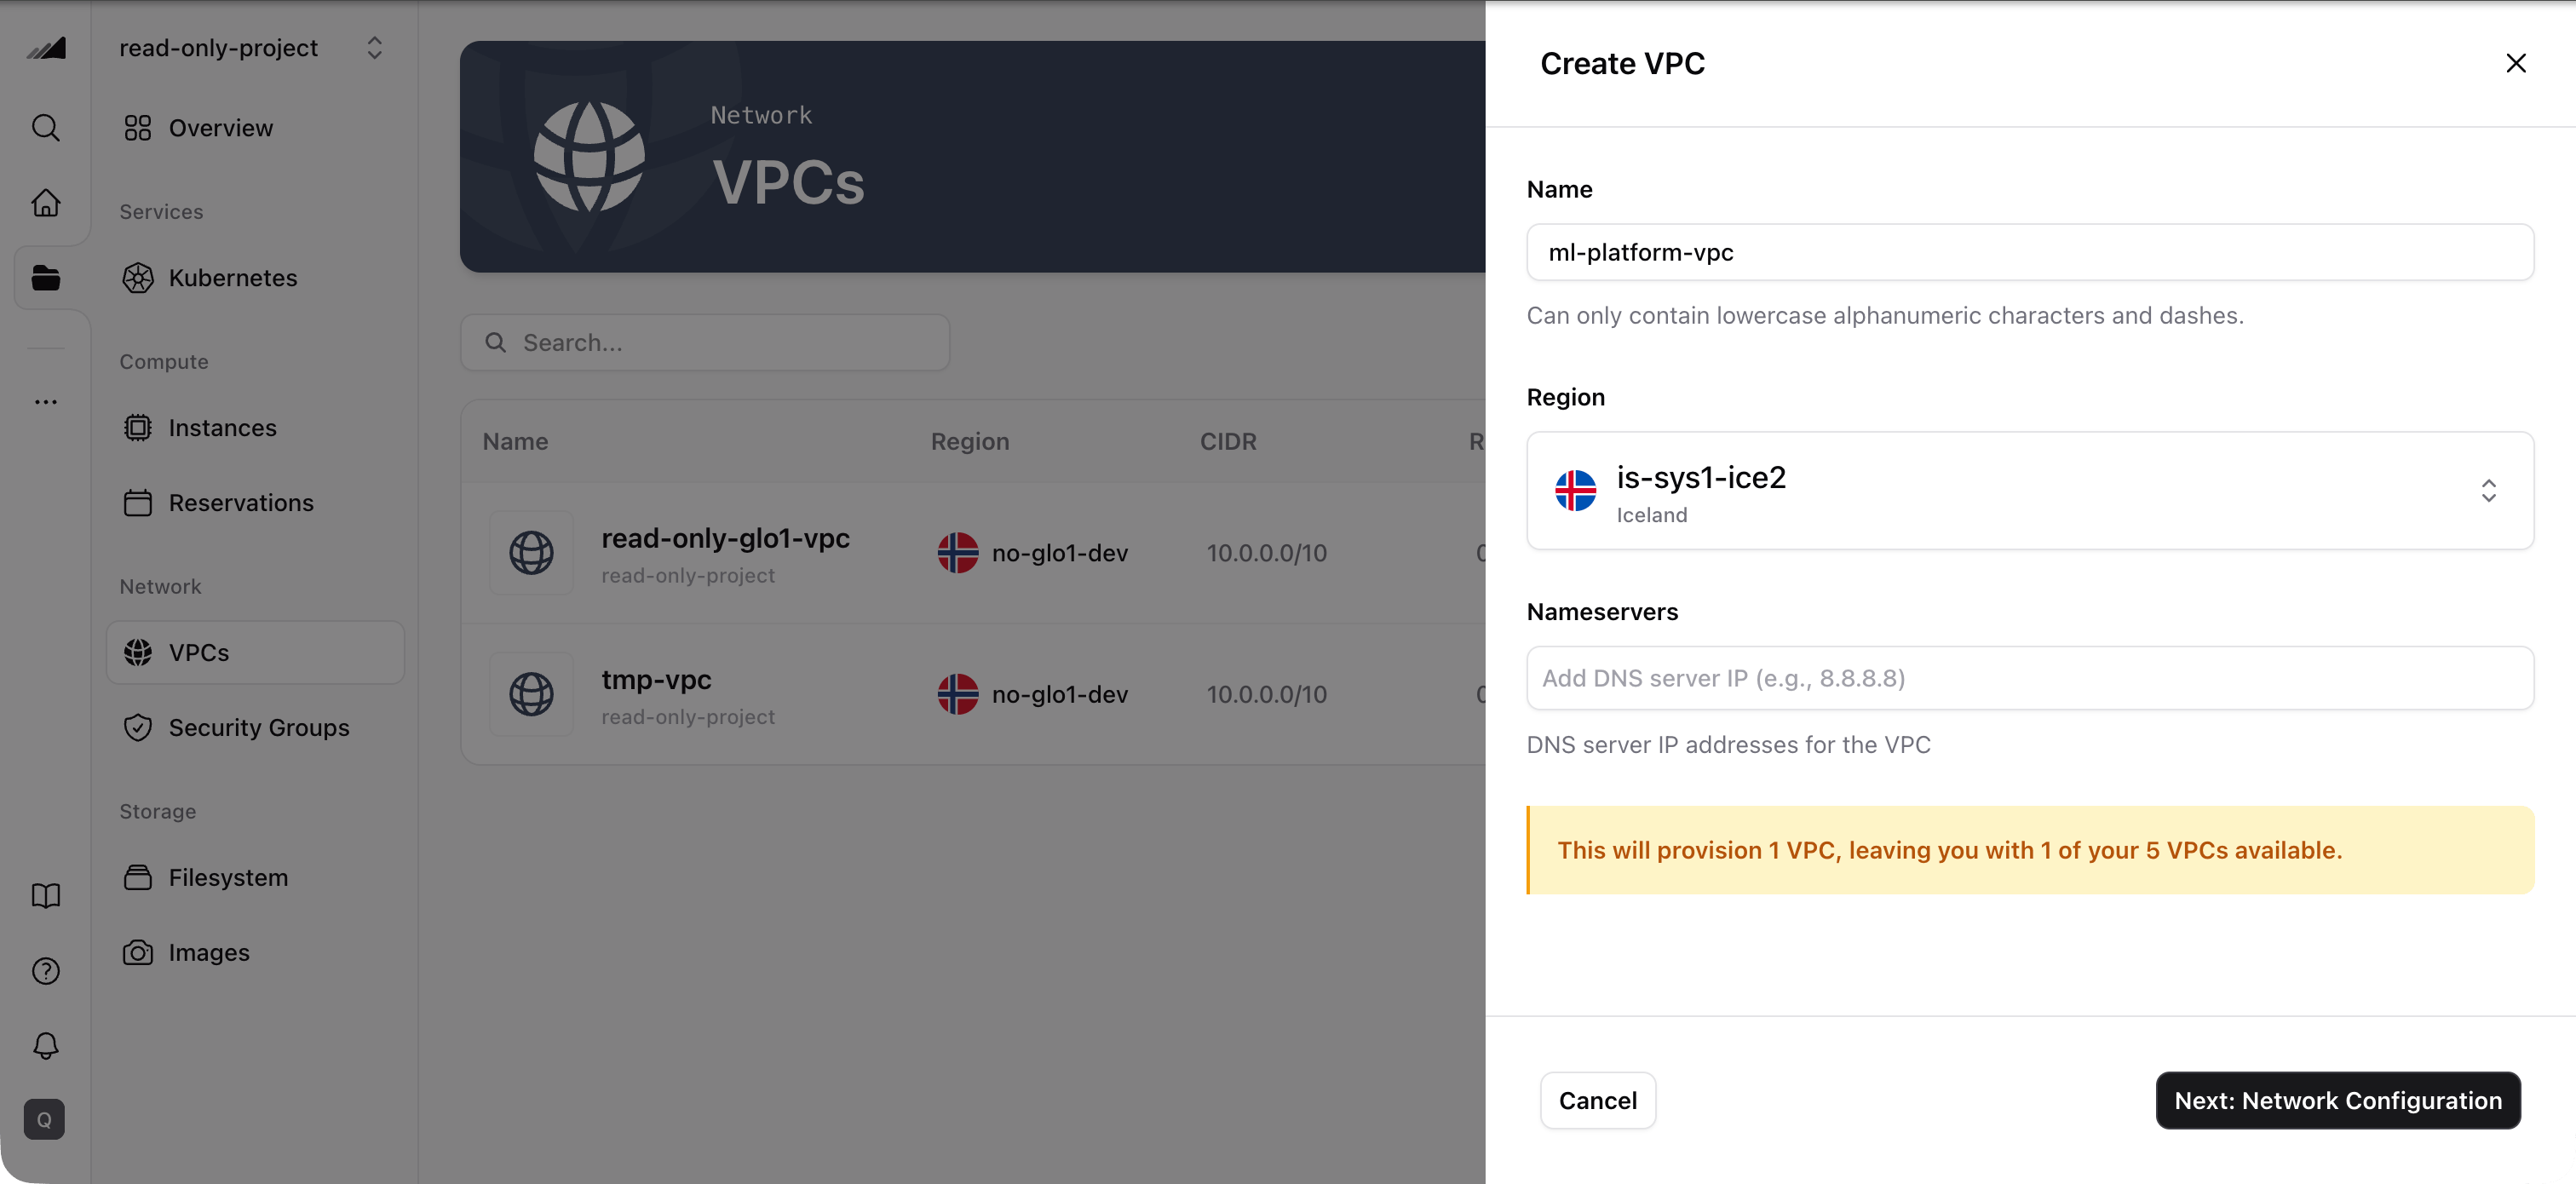
Fill in the VPC details:
- Name: Enter a name for your network. It can only contain lowercase alphanumeric characters and dashes (e.g.
ml-platform-vpc). - Project: Choose the project where the VPC should exist.
- Region: Select the region for the VPC.
- Nameservers: Optionally add one or more DNS server IPs.
- Name: Enter a name for your network. It can only contain lowercase alphanumeric characters and dashes (e.g.
- Click Next: Network Configuration.
Step 2 — Network Configuration
-
Define the VPC’s address range:
- Network Address: The base network address (e.g.
10.0.0.0). This must be the network base address — the host bits below the mask must be zero. - Network Mask: The prefix length, from
/8to/24. This sets the total number of IP addresses available in the network.
This IP allocation is permanent. To change it, you’d need to delete this VPC and reprovision all your machines.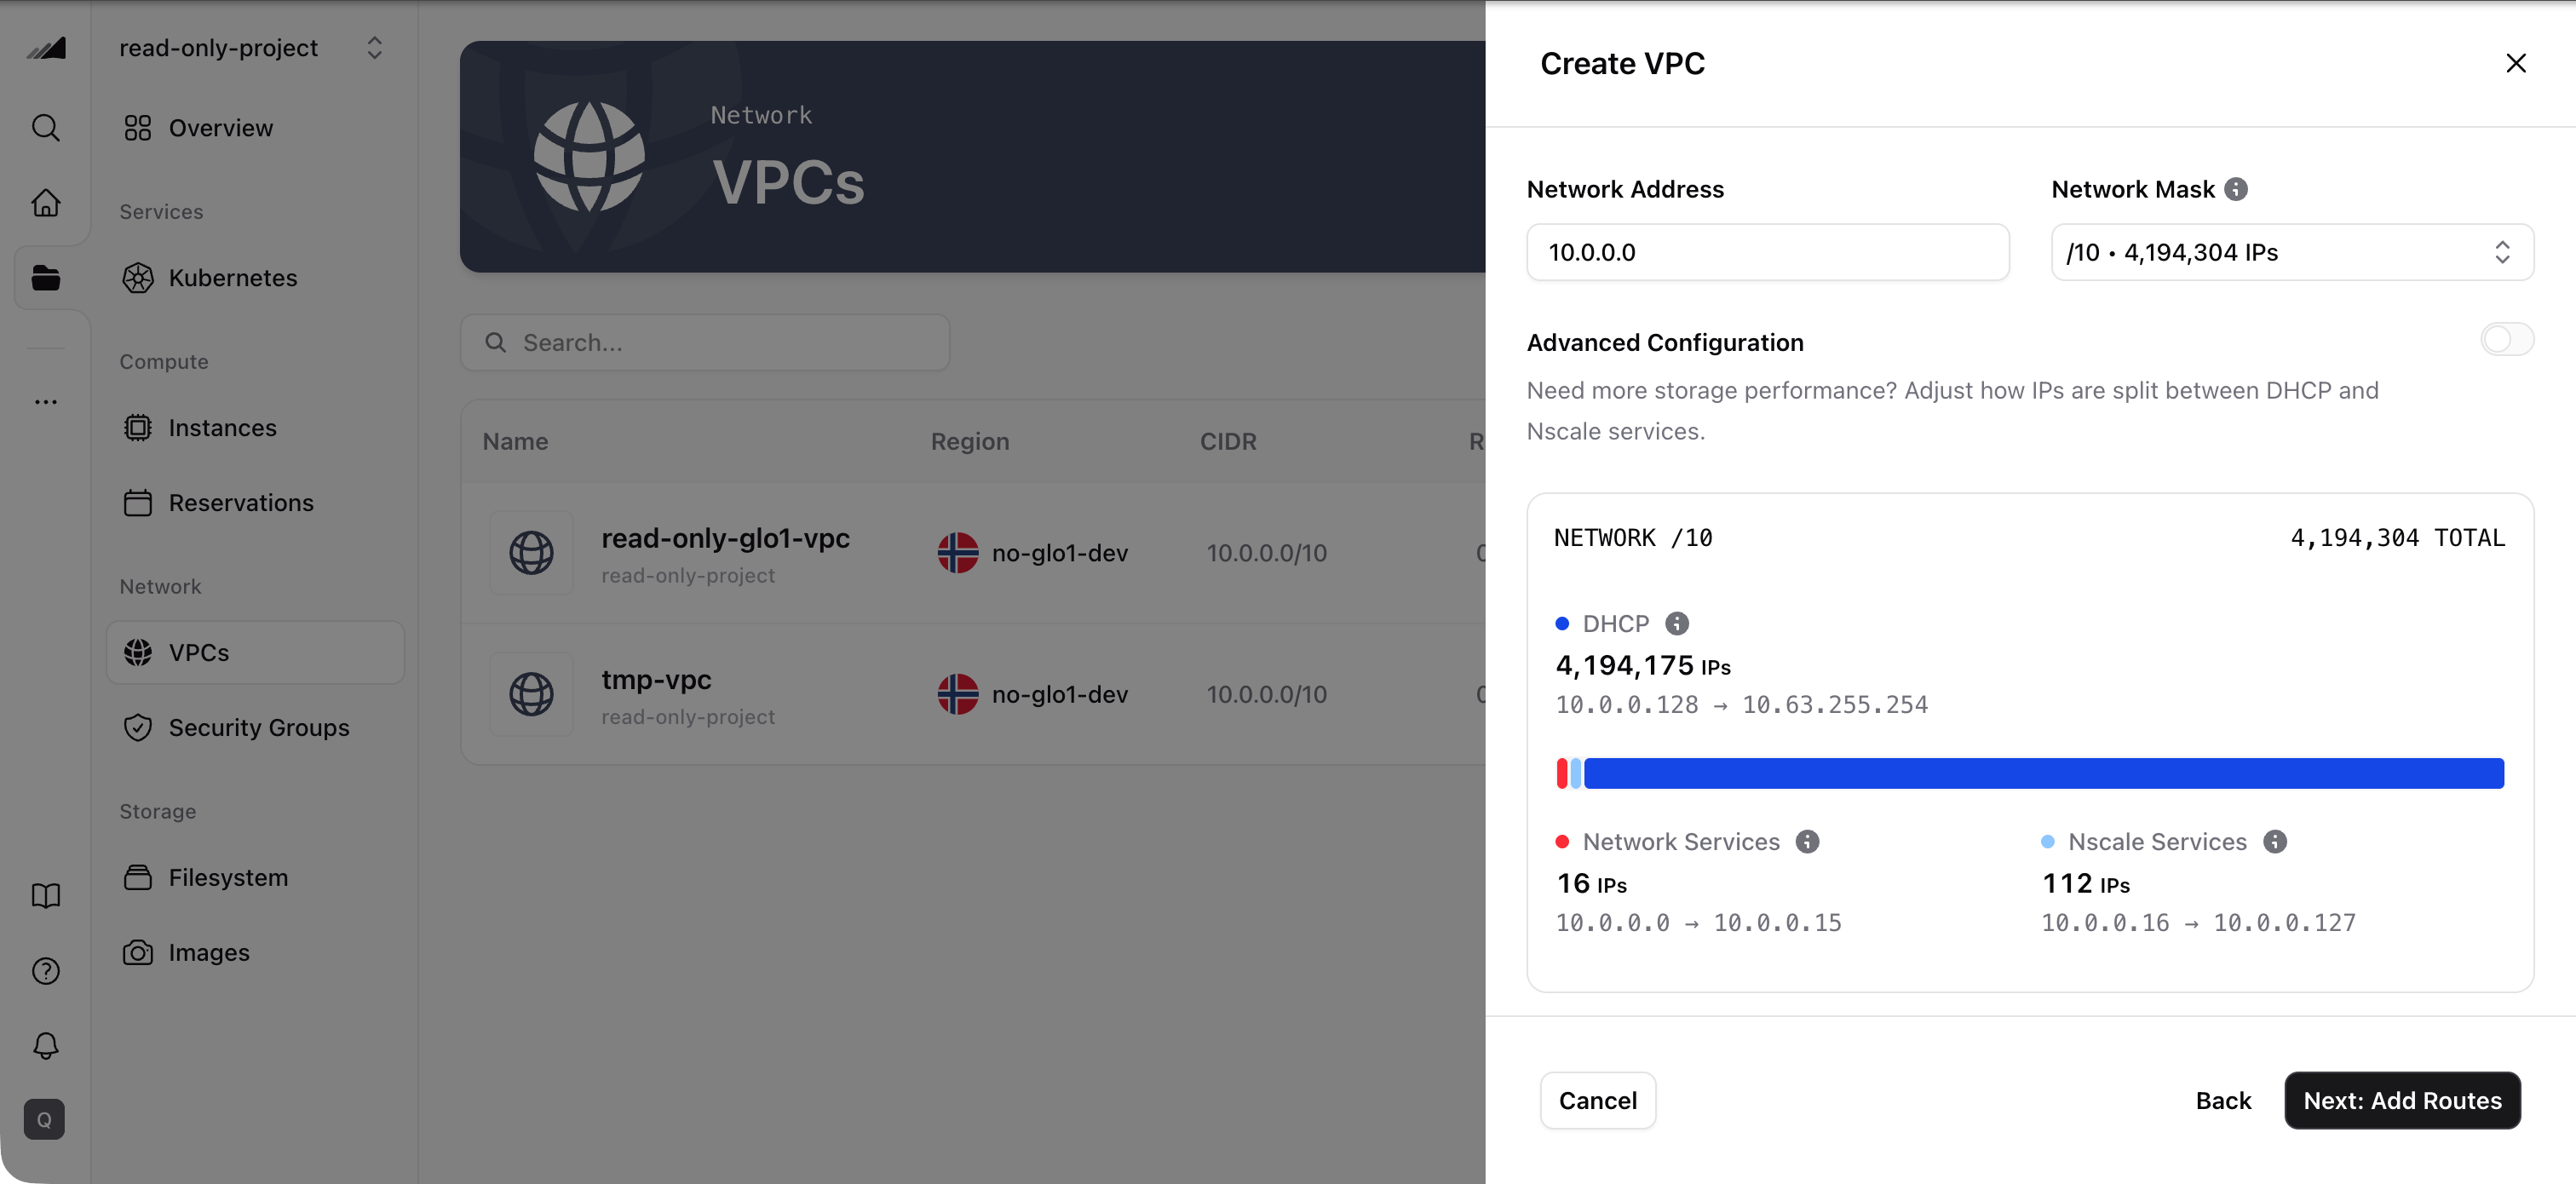
- Network Address: The base network address (e.g.
- (Optional) Turn on Advanced Configuration to control how the network’s IP space is divided. See Advanced Configuration (IP reservations) below.
- Click Next: Add Routes.
Step 3 — Add Routes
-
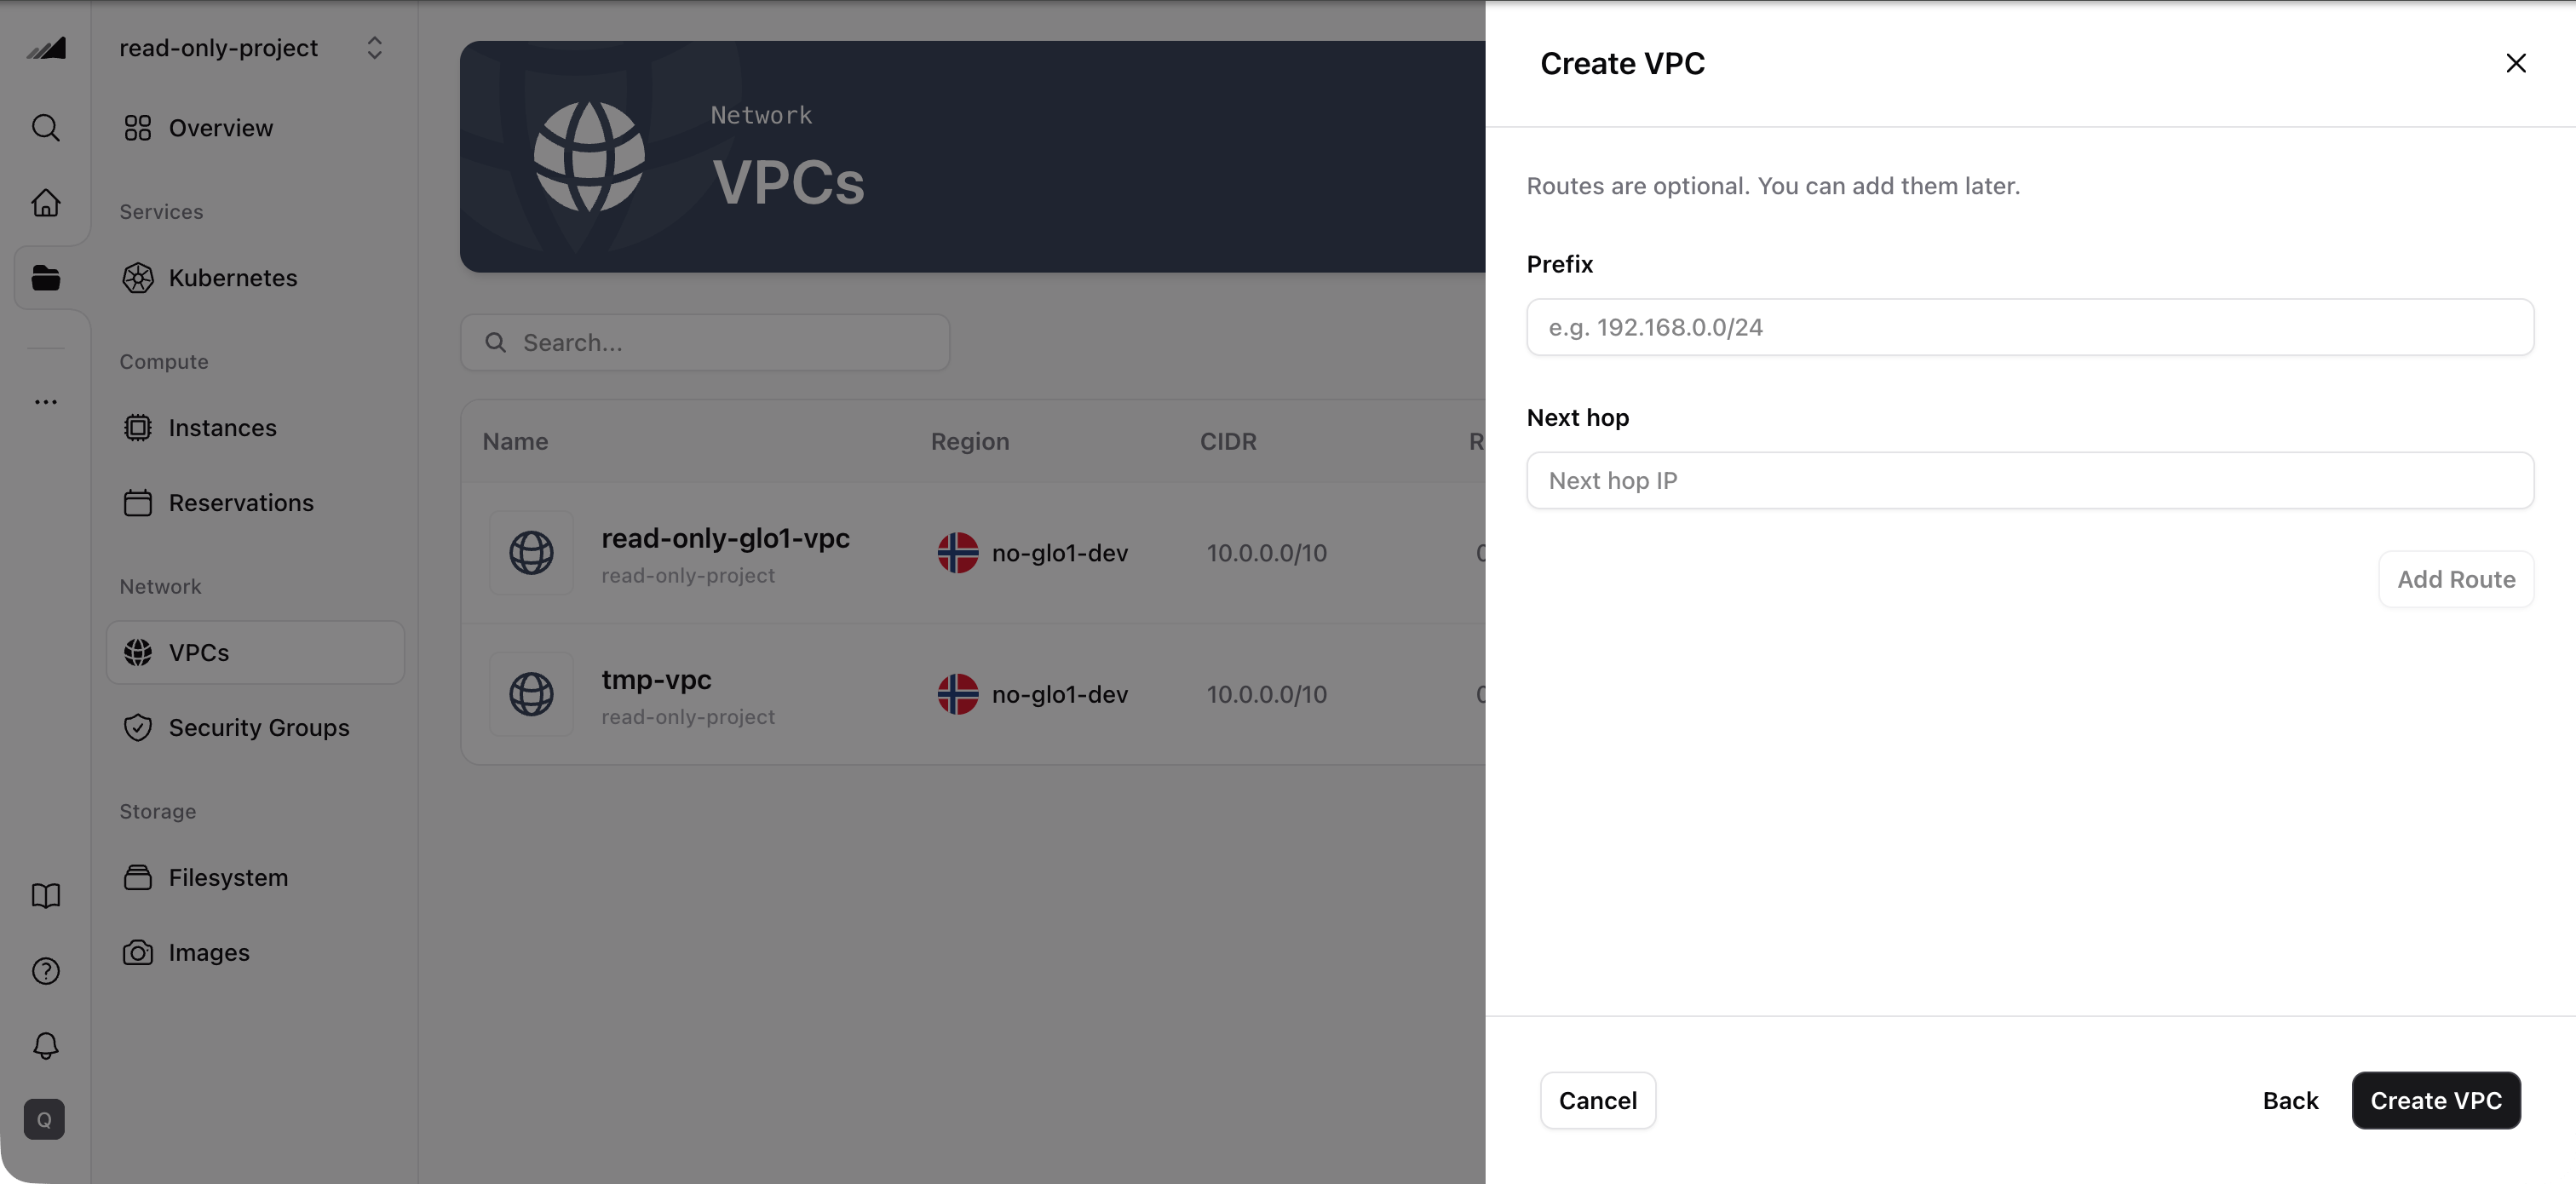
(Optional) Add static routes for the VPC:
- Prefix: The destination CIDR block (e.g.
192.168.0.0/24). - Next hop: The IP address traffic for that prefix should be forwarded to.
- Click Add Route to add it to the list. Repeat for additional routes.
- Prefix: The destination CIDR block (e.g.
- Click Create VPC.
- Verify the result — the new VPC appears in the VPC list for the selected project and begins provisioning.
Advanced Configuration (IP reservations)
By default, nscale automatically divides your VPC’s IP space between the addresses handed to your machines (the DHCP pool) and a block reserved for Nscale services and network services (gateway, DNS, and metadata). Most VPCs never need to change this. Advanced Configuration lets you tune that split. On the Network Configuration step, toggle Advanced Configuration on to reveal two controls and a live allocation preview:- Define your reservation block: The block of IPs set aside for Nscale services and network services — these are unavailable for DHCP.
- Define network services: Your portion within the reservation block for gateway, DNS, and metadata. The remainder of the reservation block goes to Nscale services.
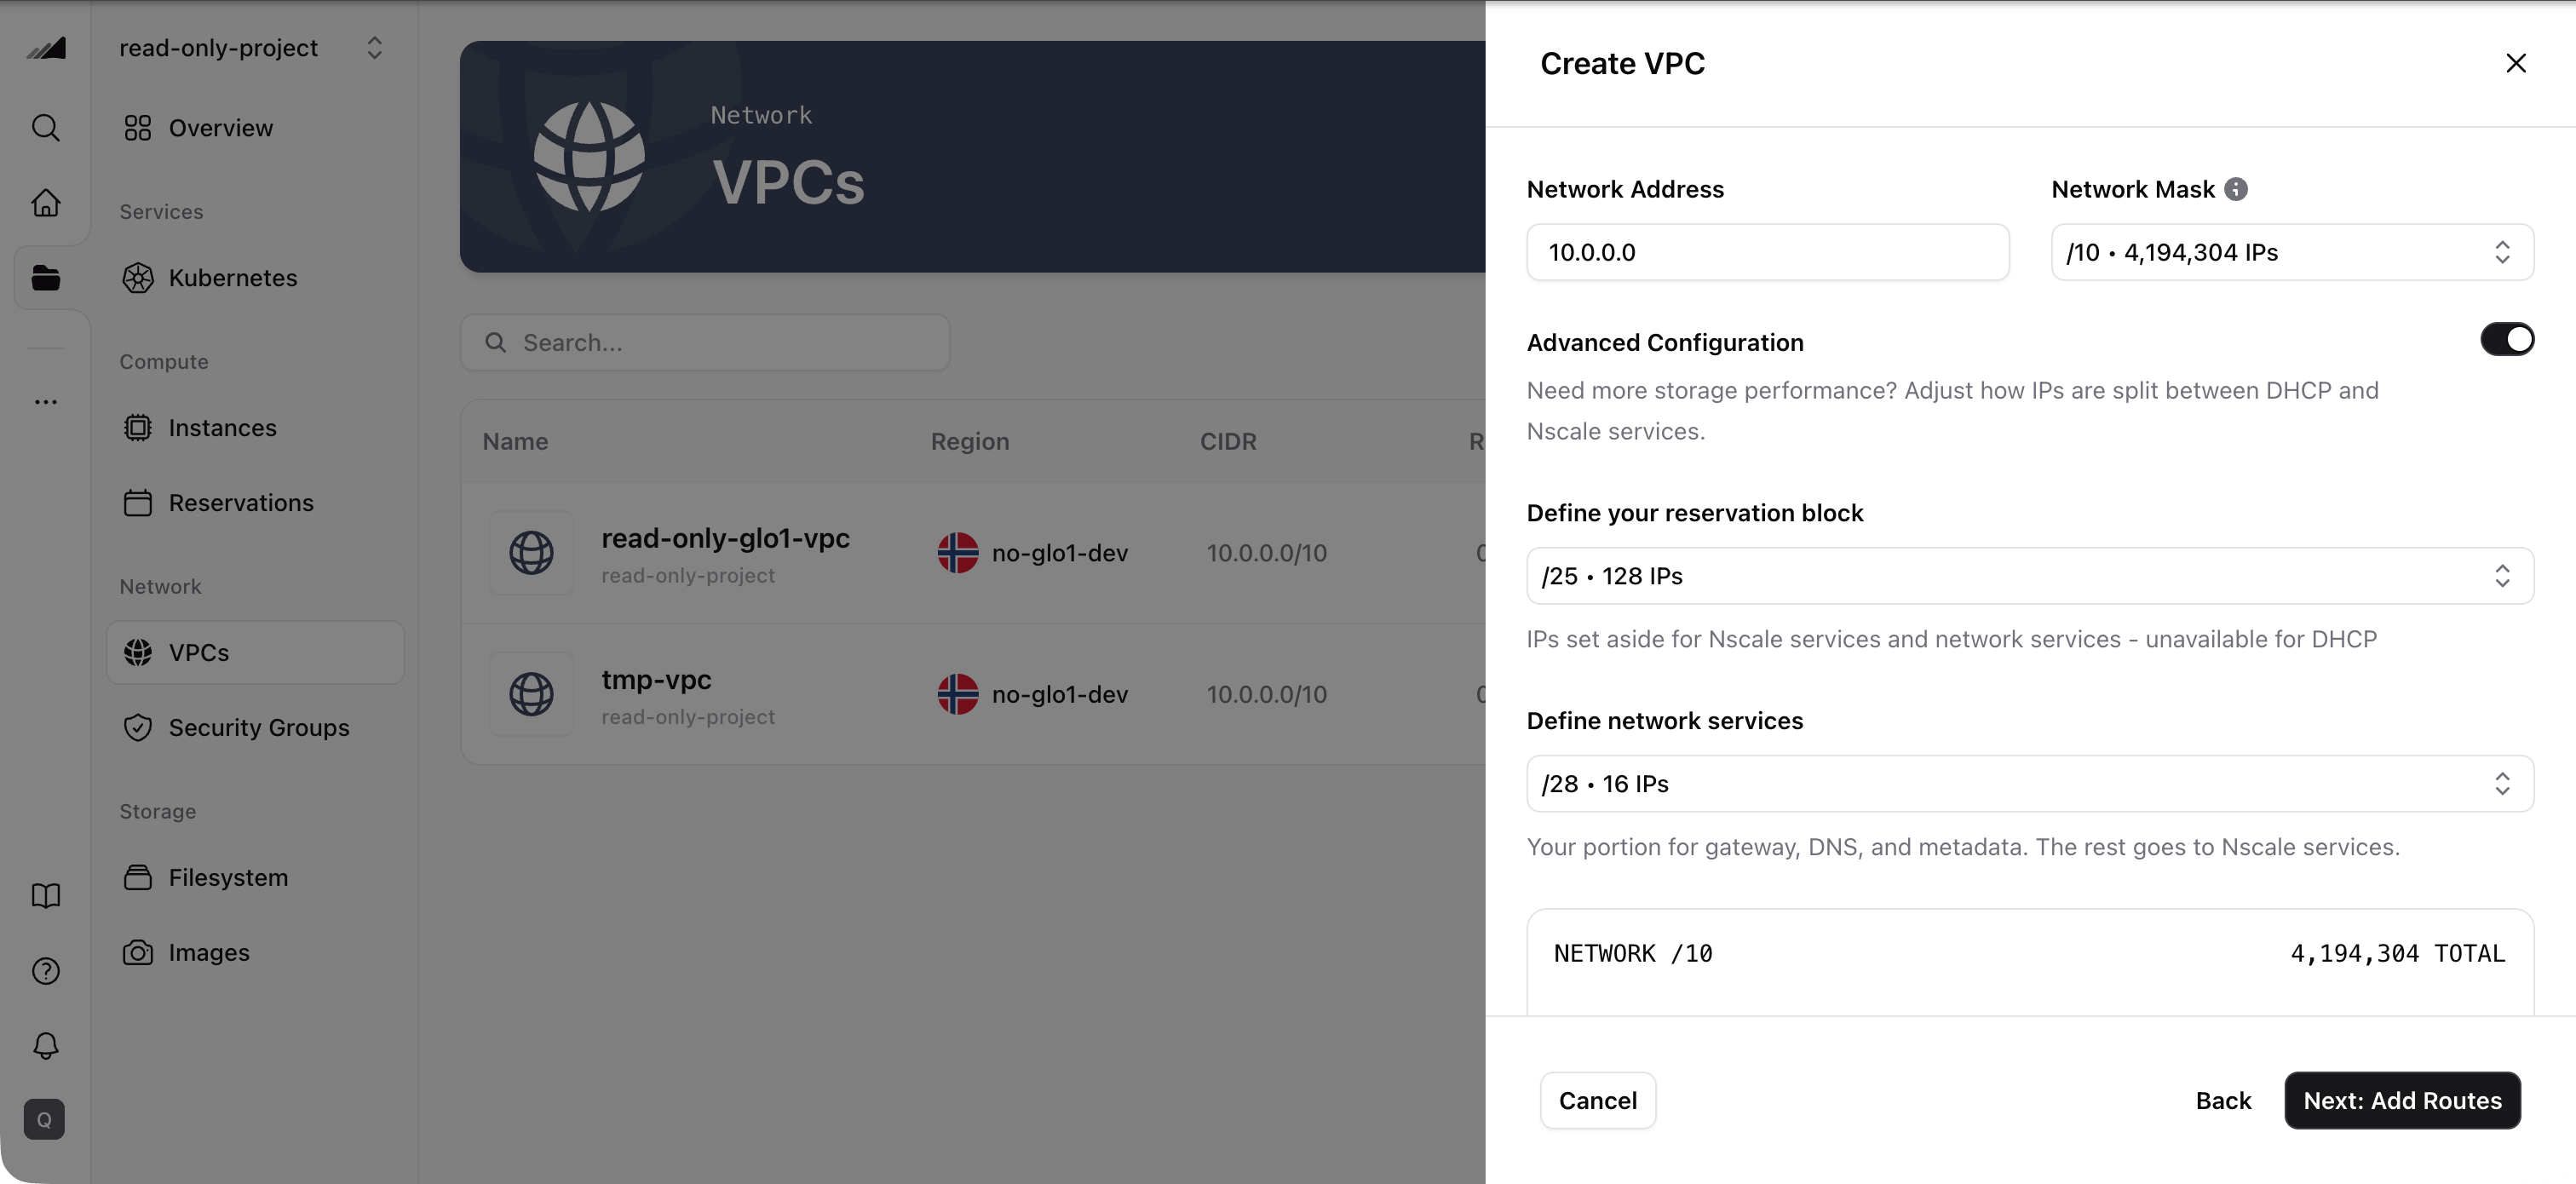
Advanced Configuration is optional. If you leave it off, nscale applies a sensible default reservation and the rest of your network is available to the DHCP pool.
Quotas
To check your current network quota, go to the Resource Usage section on the Dashboard. The dashboard shows your provisioned and total limits for networks alongside GPU, servers, clusters, and filesystem quotas.Common Issues / Troubleshooting
- Symptom: You can’t find a VPC you expect to see in the Console. Likely cause: The Console is currently scoped to a different project. VPC networks are project-scoped, so you’ll only see VPCs created in the selected project. Fix: In the Console, switch to the correct project, then return to Network → VPCs and check the list again.
- Symptom: Your DNS server IPs changed after the VPC was created. Likely cause: DNS servers can change over time (for example, if your upstream DNS changes), and the VPC still has the older nameservers configured. Fix: Go to Network → VPCs, select the VPC, and update the Nameservers. You can return later at any time to edit them.
- Symptom: The Region list is missing the region you expect. Likely cause: VPCs can only be created in regions that support them, so other region types are filtered out of the picker. Fix: Choose one of the regions shown. If the region you need is missing entirely, contact support to confirm availability.
Related Resources
Instances
Create compute instances inside your VPC
Security Groups
Control traffic rules for resources in your VPC
Filesystem
Attach shared persistent storage within your VPC
API Reference
Manage VPCs programmatically via the Networking and Storage API